How do you clean a sanding sponge
A sanding sponge can be used wet or dry — and if you rinse it out to remove the residue each time, you can reuse it many times. Wet sanding doesn’t scratch the wood as much as dry sanding, if that happens to be a concern.
Can you rinse off a sanding sponge?
A sanding sponge can be used wet or dry — and if you rinse it out to remove the residue each time, you can reuse it many times. Wet sanding doesn’t scratch the wood as much as dry sanding, if that happens to be a concern.
How do you refresh sandpaper?
Start up your power sander and dust collection system, making sure to wear hearing and eye protection. Then slowly press the rubber sole of an old sneaker along the sandpaper. You’ll see (and smell) the results instantly. You’ll have clean sandpaper in seconds, with a hint of hot rubber in the air.
Are Sanding sponges better than sandpaper?
In addition to sandpaper, there are other abrasives, available in a range from coarse to fine: Sanding sponges are flexible pads with an integrated grit. They’re effective on both flat and contoured surfaces, and you can use them for wet-sanding or dry-sanding. They’re more durable than sandpaper and are reusable.How do you keep sandpaper from clogging up?
Another great option to prevent clogging is to get sandpaper that is dry-lubricated with substances like zinc stearate.
How do you clean and reuse sandpaper?
Soak It in Water Eco Brooklyn, a New York contracting and design firm, discovered a way to effectively clean sandpaper to reuse and reduce sanding waste: Soak the sandpaper in water for a few hours. Gently brush debris off with a steel brush. Let it dry, and you’ll have a fresh pad of sandpaper ready to go!
How do you stop sandpaper buildup?
In can help to keep a block of wood that’s not prone to clogging on hand, and just run it against the sander when buildup starts. Switching belts may also help. I find that coarser grits tend to clog less, so take the time to switch to a coarse belt if you’re removing a lot of material.
Should I wet a sanding sponge?
Wet sanding with a sponge is ideal for small patches and tight corners since it’s easier to work a sanding sponge into those areas. Wet sanding also creates less dust, making it easier to clean up after the job is done. … Dry sanding offers a more even and smooth finish.When should I change my sanding disc?
You should change your sandpaper when it gets too clogged by the material you are sanding or if the abrasive side is too worn down to smooth out your surface. If you have noticed that you have to apply much more pressure or it takes too long to work, you should substitute your sandpaper.
What does a sanding sponge do?Similar to sandpaper, sanding sponges are used to smooth an object’s grit or texture. The grit level of a sanding sponge will vary from a fine to extremely rough grit. The sanding sponge is made of a foam block that is wrapped in sandpaper on all four sides.
Article first time published onHow do you stop Corning when sanding?
- Let the finish dry longer before sanding. …
- Use a stearated (dry-lubricated) sandpaper. …
- Use a lighter touch (to create less heat).
Why is sandpaper used for smoothening surfaces?
just because when we rub sandpaper against an object the top most layer starts shredding away and we can see the smooth surface which was actually the inner one.
How do you clean a hook and loop Sander pad?
Here’s a simple fix: Buy a nit comb at a pharmacy. They’re sold for removing head lice eggs, and the metal tines are much closer together than a standard hair comb. Drag it across the sander’s pad vigorously, and the tines will clear the debris easily without harming the loops.
What do you do with used sandpaper?
- Sharpen Dull Scissors. …
- Remove Pills From Upholstery And Clothing. …
- Remove Rust From Tools. …
- Improve The Traction Of New Shoes. …
- Deter Cats From Scratching Or Spraying. …
- Sharpen Dull Sewing Needles. …
- Restore Scuffed Or Stained Suede. …
- Maintain Wood Cutting Boards.
What are sanding belt cleaners made of?
Purchase a Belt-Cleaning Stick Fintech Abrasives sells cleaning sticks specifically designed for sanding belts. They are made from rubber and look like a giant pencil eraser.
Can you sand metal with belt sander?
The heavy duty belt sander was designed to do general material removal whether it’s wood and or metal. Making sure you use the right belt type and grit for the material that you’re wanting to sand. … If your sanding metal you be able to remove all sharp edges and round corners quickly.
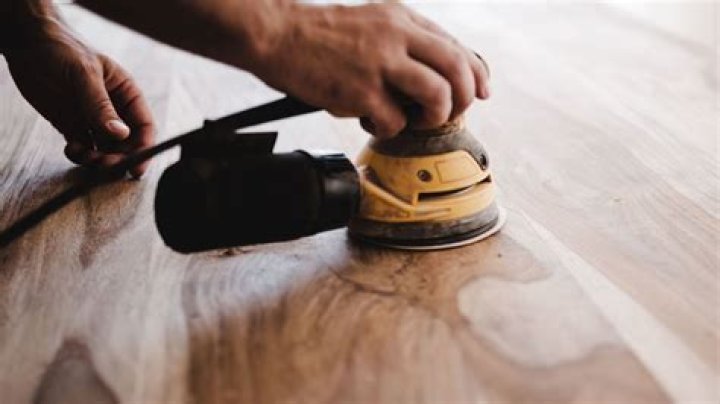
How long should you use a sander for?
Sanding a piece of furniture shouldn’t take more than 5 minutes. When you picture yourself sanding a furniture piece, you might envision yourself sanding away with a small piece of sander for hours to get every bit of old stain or paint.
What causes swirls in wood when sanding?
A random orbital sander can leave swirl marks due to poor quality sandpaper, improper technique, or an inability to clear the dust from the surface.
How often do you change a sanding belt?
The abrasives we sell at Pete’s have very distinct lifespans; drum sander belts should last between 250 and 300 square feet each and edger discs should be changed every 20 linear feet.
Is it better to wet sand or dry sand?
Wet sanding, which is sanding with the addition of water to act as a lubricant, is less abrasive than dry sanding, and results in a smoother finish. It’s best to wet-sand the final finish of a project. Dry sanding removes more material, and smooths rough material quickly.
How many coats of drywall mud do I need?
If your wall has distinct crevices, cracks, or textured areas, or if your brand of drywall mud isn’t offering enough coverage, you may have to do a couple of additional coats of compound. However, in general, you’ll need one coat to fill in the seams and three more coats after taping.
How do pros sand drywall?
Wet Sanding Drywall Tips Rub the coarse side against the drywall in a circular motion, making sure to work it into the edges so all areas are smooth. Continue rubbing until the area softens to an even surface. If the sponge begins to dry out, submerge it again and repeat as needed.