How do you make stairs in AutoCAD
Open the tool palette that you want to use, and select a stair tool. If necessary, scroll to display the tool that you want to use. … Specify the insertion point of the stair. … Specify the direction point of the stair. … Continue adding stairs, and press Enter.
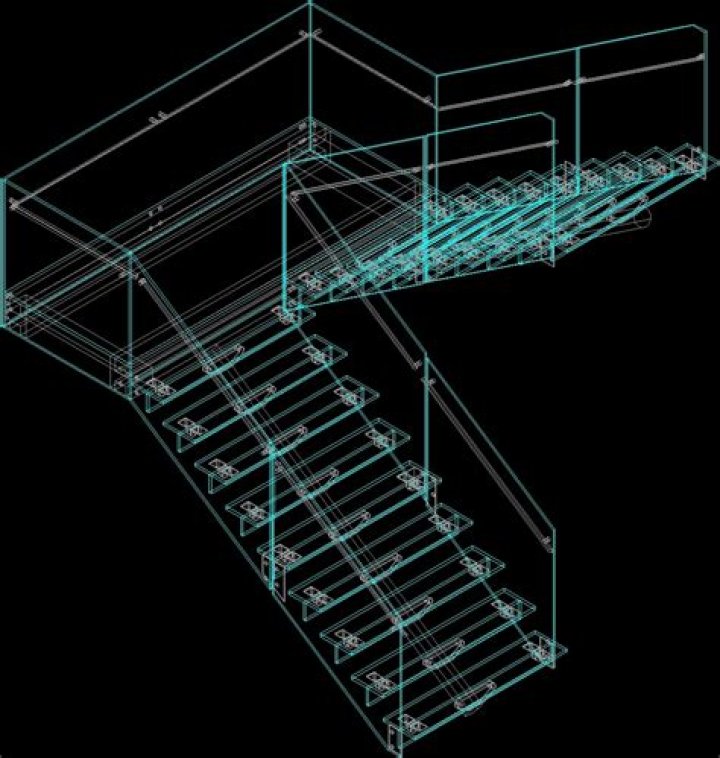
Where is the stair tool in Autocad?
You may want to create your own stair tools if you are placing multiple stairs of a specific style and they all have the same property. Open the tool palette on which you want to add a tool. select the stair, and drag it to the tool palette. Click Manage tab Style & Display panel Style Manager.
How do you plan stairs?
- Measure the height of the area where you will install the stairs. …
- Divide the total rise by the typical rise per step. …
- Divide the total rise by the number of steps to get the actual rise per step. …
- Establish the run of each step. …
- Find the total run of the staircase. …
- Decide if your stairs need landings.
How do I build stairs in Autocad floor plan?
- Open the tool palette that you want to use, and select a stair tool. If necessary, scroll to display the tool that you want to use. …
- Specify the insertion point of the stair. …
- Specify the direction point of the stair. …
- Continue adding stairs, and press Enter.
How do I make a ladder in AutoCAD?
- Click Schematic tab Insert Wires/Wire Numbers panel Insert Ladder drop-down Insert Ladder. …
- Specify the width and spacing of the ladder.
- Specify the first reference, index, and rungs. …
- Specify whether to create a one-phase or three-phase ladder. …
- Specify how to draw the rungs. …
- Click OK.
How do I make a foundation plan in AutoCAD?
Right-click and click Create foundation plan, or select the following option from: Menu: Formwork Drawings > Plan of foundations. Ribbon: ASD Drawings > Create drawings > Plan of foundations. Toolbar: Drawings > Plan of foundations.
How do you draw stairs in AutoCAD 2d?
- Open the tool palette that you want to use, and select a stair tool. If necessary, scroll to display the tool that you want to use. …
- Specify the insertion point of the stair. …
- Specify the direction point of the stair. …
- Continue adding stairs, and press Enter.
What is stair headroom?
Stair Headroom. Headroom is the space that lies between the head and sill of a doorway or between the ceiling and floor, allowing passage of a person standing upright. Headroom is also the height above the nosing of a tread to the ceiling above it. … WIKIPEDIA ENTRY FOR STAIRWAY.What is the elevation of stairs?
Standard Step Height On average, American architects have used a standard stair height of 7.5 inches. On stairs built inside, the average tread width is 9 inches, while outside treads have an average width of 11 inches.
How do I draw section and elevation in Autocad?- Draw an elevation line in the drawing.
- Select the elevation line.
- Click Building Elevation Line tab Modify panel Generate Elevation.
- Select the type of elevation object you want to create: …
- For Style to Generate, select a style for a 2D elevation.
How do you build stairs on a floor plan?
To create a staircase With the floor plan view active, select Build> Stairs> Draw Stairs and click, drag, and release the mouse button to create the stairs. In this example, the staircase is intentionally drawn too short, which allows you to modify the staircase so that it reaches the second floor.
How do I calculate stairs?
You divide the height by 7 inches; if, say, the floor-to-floor distance is 8 feet, 10 inches (or 106 inches), then you’ll need 15 treads (106 divided by 7 equals 15.14). Next, you divide the height by the number of treads (15 into 106), producing the exact tread height (7.06 inches).
How do I create a column layout plan?
- Column Shape Choose. …
- Draw the Column. …
- Fixed the Column Location. …
- Set the Grid Line. …
- Numbering the Grid Line. …
- Set the Dimension Respect to Grid Line.
What is the best angle for stairs?
Stair codes and guidelines prefer an angle of around 37° for normal stairways (the green area in our illustration) and around 7° for ramps (the yellow area in our illustration). Steeper slopes or angles are permitted for stepladders in certain applications as you can see in the illustration.
What is the best slope for stairs?
The acceptable slope is between 20 and 50 degrees, with the preferred slope being between 30 and 35 degrees.
What is the best rise and run for stairs?
In my mind, though, the ideal stair rise-run is 7 1/4 by 10 inches. If you have to deviate from this, use the following rules of thumb: Unit rise times unit run (in inches) should equal 72 to 75. Two rises plus one run should equal 24 to 25 inches.
What are stair winders?
Winders are steps that are narrower on one side than the other. They are used to change the direction of the stairs without landings. A series of winders form a circular or spiral stairway. When three steps are used to turn a 90° corner, the middle step is called a kite winder as a kite-shaped quadrilateral.
What is soffit in stair?
The soffit is the underside of the stair or bottom of the stair slab. Under the surface of the stair called the soffit.
What is stringers in staircase?
A stair stringer (also called ‘string’ or ‘stringer board’) is the housing on either side of a flight of stairs, into which the treads and risers are fixed. A staircase will have two stringers, one on either side of the steps.
How do I create a section in Autocad?
- Draw a section line in the drawing.
- Select the section line, and click Building Section Line tab Modify panel Generate Section.
- Select the type of section object you want to create: …
- For Style to Generate, select a style for a 2D section.
How do you create sections in Autocad?
- Click Layout tab Create View panel Section drop-down Full. …
- Click the view you want to use as the parent view. …
- Click in the drawing area to indicate the start point of the section line. …
- Click in the drawing area to indicate the end point of the section line.